Understanding Time Lapse Recording
Time lapse recording is a specialized filming technique that compresses an extended period of activity into a short, dynamic video segment. This process involves capturing a sequence of individual photos at set intervals over hours, days, or even months, which are then compiled into a single video that plays at a faster speed than real time. The result is a captivating visualization of change—whether it’s the movement of clouds across the sky, the bustling activity of city streets, or the gradual construction of a building.
The primary purpose of time lapse recording is to highlight processes that unfold slowly and to make these transformations visually engaging in a significantly condensed format. It allows viewers to observe phenomena that are typically imperceptible within a short time frame—such as plant growth, traffic flow, or weather patterns—offering insights and perspectives that are impossible to appreciate through real-time viewing alone.
In practical applications, time lapse footage serves a variety of professional and creative needs. Filmmakers, real estate developers, event organizers, and urban planners frequently utilize this technique to document progress and illustrate change over time. For example, a construction company might use time lapse videos to showcase the development of a new project from groundbreaking to completion, while city planners may analyze traffic patterns during peak hours or monitor environmental conditions.
Achieving high-quality time lapse footage requires an understanding of specific equipment, precise setup, and careful post-processing. When executed properly, this technique produces visually stunning videos that concisely communicate complex changes, making it an invaluable method for various professional disciplines. The ability to capture and condense time provides a unique perspective, transforming long-term events into impactful visual narratives that resonate with audiences and stakeholders alike.
Equipment Needed for Time Lapse Recording
To capture compelling and high-quality time lapse footage, selecting the right equipment is essential. The core components typically include a reliable camera capable of manual control over exposure, focus, and frame rate. DSLR and mirrorless cameras are popular choices due to their versatility and image quality. Additionally, specialized motion control systems or motorized sliders can enhance the dynamic range of motion, enabling smooth panning or tracking shots that add depth to the final video.
Another critical piece is the intervalometer — a device that automates the interval between each shot. This allows for consistent timing, which is crucial for producing seamless sequences. Modern cameras often have built-in intervalometers, reducing the need for external devices. When selecting an intervalometer, consider features such as programmable intervals, exposure control, and compatibility with your camera model.
Accurate stabilization is key to avoiding unwanted shake or jitter. Tripods are a fundamental element, with options available ranging from lightweight portable models to heavy-duty setups for long-term installations. For scenarios requiring camera movement, motorized sliders or gimbals provide smooth, controlled motion, adding a dynamic element to your shots.
Lighting control is equally important. Depending on available natural light and scene requirements, additional lighting or filters such as ND filters can help maintain consistent exposure throughout extended shooting periods. Extra batteries and storage cards are recommended to handle prolonged shooting sessions, ensuring uninterrupted recording over hours or even days.
In summary, the combination of a high-quality camera, reliable intervalometer, stable support system, and supplementary accessories forms the foundation for successful time lapse recording. This equipment provides the technical precision and stability needed to produce professional-grade visuals that effectively convey change and progress over time.
Setting Up for Successful Time Lapse Shots
Proper setup is essential to maximize the quality and impact of your time lapse footage. Begin by selecting an ideal scene that offers visual interest and a clear sense of progression, such as urban development, natural phenomena, or crowded public spaces. It’s important to secure your camera on a stable surface or tripod to prevent movement during shooting, which could introduce jitter or misalignment in the sequence.
Determine the best vantage point, considering factors such as lighting conditions, weather, and potential obstructions. Once positioned correctly, configure your camera settings for optimal quality. Use manual focus to prevent focus shifts, and set a consistent exposure schedule—such as manual exposure mode—to avoid fluctuations that could result in flickering in the final video.
To ensure consistent framing throughout the shot, lock the camera’s settings and, if possible, use a remote or intervalometer to automate the capturing process. Regularly check the scene and equipment during longer sessions to adjust for environmental changes like lighting variations or unexpected movement.
In addition to technical factors, plan the duration and intervals carefully. Longer intervals are suitable for slow-moving subjects like sunrise or construction progress, whereas shorter gaps are appropriate for rapid activities like traffic or crowds. Effective pre-shoot planning reduces the need for extensive post-processing and helps produce smooth, cohesive sequences with impactful storytelling.
Technical Considerations and Camera Settings
- Resolution and frame rate: Use the highest possible resolution your setup allows for sharp, detailed footage; typical frame rates for smooth playback are 24 or 30 frames per second.
- Interval timing: Set intervals based on the speed of the subject or event, ranging from one second to several minutes.
- Exposure and white balance: Use manual settings to maintain consistency, avoiding auto-adjustments that can cause flickering.
- Focus: Manual focus locks the focal point, preventing shifts during long recording periods.
- Battery and storage: Prepare ample power and memory to accommodate hours or days of shooting without interruptions.
Careful attention to these parameters ensures the resulting footage is stable, clear, and visually coherent.
Editing and Post-Processing of Time Lapse Footage
After capturing your images or footage, post-processing is crucial for refining the final product. First, import all images or videos into editing software capable of handling time lapse sequences. Tools like Adobe Premiere Pro, Final Cut Pro, or dedicated time lapse editors streamline the process of assembling frames into a fluid video.
Depending on the project, adjustments such as color grading, contrast enhancement, and stabilization can significantly improve visual appeal. Removing flickering—common in footage with inconsistent lighting—may require specialized plugins or third-party software that analyze and correct exposure discrepancies across frames.
Speed adjustments, including increasing or decreasing playback speed, allow further storytelling and emphasis on particular moments. Additionally, adding music, text overlays, or transitional effects can enhance engagement and clarity for viewers.
Proper post-processing transforms raw images into dynamic, professional videos that compellingly represent the passage of time, making them suitable for commercial, educational, or artistic purposes.
Applications of Time Lapse Recording in Miami Productions
In Miami, the application of time lapse recording extends across multiple industries, offering visual documentation and storytelling advantages. Real estate developers frequently utilize time lapse videos to demonstrate property development from groundbreaking to completion, providing clients and stakeholders with a compelling overview of progress. Urban planners and city officials use footage to monitor traffic flow or environmental changes, aiding in data analysis and strategic planning.
Construction projects often incorporate time lapse documentation as a record of the building process, which can be used for marketing or regulatory purposes. Event organizers leverage this technique to capture festivals, parades, or large public gatherings, creating promotional material that underscores activity and scale.
Filmmakers and content creators in Miami also employ time lapse to capture the city’s vibrant character—skyline transformations, sunset views over the bay, or bustling street scenes—adding energetic and engaging visual layers to multimedia productions.
Legal and Ethical Considerations
When undertaking time lapse projects, it's vital to respect privacy and property rights. Secure necessary permissions before capturing footage in private areas or sensitive locations. Avoid intrusive practices that might infringe upon individuals’ privacy or disrupt operations. Transparency about recording activities and intentions can prevent misunderstandings and foster positive community relations.
Choosing a Miami Production Agency for Time Lapse Projects
Partnering with an experienced production company specializing in time lapse photography ensures high-quality results tailored to specific project needs. An expert agency understands the technical nuances, legal requirements, and creative strategies essential for producing impactful time lapse visuals. Their experience is invaluable in planning, executing, and post-processing projects that meet professional standards and exceed client expectations.
Technical Considerations and Camera Settings
Achieving compelling time lapse recordings requires careful attention to technical parameters and camera configurations. Selecting the right settings ensures that the footage captures the intended scene with clarity, consistency, and visual appeal. Key considerations include resolution, frame rate, shutter speed, and interval timing, each playing a crucial role in the final product.
Resolution determines the clarity and detail within each frame of the sequence. Opting for higher resolutions, such as 4K, offers superior visual quality and flexibility in post-production, allowing for cropping or zooming without sacrificing image integrity. Frame rate selection influences how smooth the resultant video appears; typical choices range from 24 to 30 frames per second (fps). For time lapse videos, the actual footage is shot at a much lower frame rate, with images captured at set intervals, and then played back at the desired fps to create a smooth motion effect.
Shutter speed must be optimized to balance motion blur and sharpness, especially when capturing scenes with movement. Generally, a shutter speed of twice the interval time is recommended; for instance, if images are taken every second, a shutter speed of 1/2 second can produce natural motion. The interval timing—the duration between consecutive shots—is fundamental in portraying the desired temporal progression. Shorter intervals are suitable for capturing fast-moving scenes, such as traffic or crowds, while longer intervals work better for slow transformations like building construction or sunset changes.
Adjusting these settings according to environmental conditions, such as lighting variations and scene dynamics, is essential for high-quality results. Overexposed or underexposed footage diminishes the professional appearance of the final video, so utilizing balanced ISO settings and aperture adjustments helps maintain exposure consistency throughout the shoot.
Editing and Post-Processing of Time Lapse Footage
Post-processing transforms raw image sequences into polished, impactful videos. Software options like Adobe Premiere Pro, Final Cut Pro, or dedicated time lapse tools enable editors to refine footage by adjusting exposure, color grading, and sequencing speed. Correcting color inconsistencies that may occur due to changing lighting conditions during shooting enhances visual coherence across the sequence.
Speed adjustments and transitions can emphasize specific moments or smooth out abrupt changes. Additionally, stabilizing jittery footage intended for handheld shooting ensures a professional, polished appearance. Audio elements, narration, or background music can be integrated to add context and engagement, complementing the visual narrative.
Effective post-processing also involves removing unwanted frames or artifacts, enhancing image sharpness, and adding titles or overlays if needed. Maintaining consistency in the footage’s visual style contributes to a cohesive presentation that resonates with viewers, whether for marketing, documentation, or artistic expression.
Technical Considerations and Camera Settings
Achieving high-quality time lapse recordings hinges on meticulous attention to camera configuration. Selecting optimal camera settings is essential to ensure consistency, clarity, and visual appeal throughout the sequence. Core parameters like exposure, focus, interval timing, and power management must be carefully calibrated based on the shooting environment and project objectives.
For exposure, adjusting the ISO and aperture settings is crucial. A low ISO minimizes noise, which is especially important for long-duration shoots where image quality can degrade if noise becomes prominent. The aperture should be set to achieve the desired depth of field, balancing sharpness and light intake. To account for changing lighting conditions, especially during extended shoots, employing manual exposure controls prevents flickering caused by automatic adjustments.
Focus stability is another vital factor. Using manual focus ensures that the camera maintains a consistent focal point throughout the sequence, avoiding focus shifts that can distract viewers or diminish visual coherence. Fixed focus on a specific distance is often preferred unless dynamic scenes require adaptive focusing techniques.
Interval timing determines the rate at which images are captured per unit of time. Selecting an appropriate interval depends on the subject's speed of change. For slow processes like cloud movement or plant growth, longer intervals—ranging from 5 to 30 seconds—are suitable. For faster movements, such as traffic or construction, shorter intervals—around 1 to 3 seconds—are more effective. Adjusting interval timing in relation to shutter speed and frame rate ensures smooth motion and prevents choppy sequences.
Battery life management is often overlooked but crucial. Extended shoots require sufficient power sources to prevent interruptions. Using high-capacity batteries, external power converters, or continuous power supplies can safeguard against mid-shoot power failures, preserving the integrity of the footage. Additionally, utilizing memory cards with ample storage capacity ensures no frames are missed due to storage limitations.
Setting these parameters accurately before filming sets the foundation for successful time lapse projects. It reduces post-shoot corrections and enhances the overall quality of the final product, whether for artistic, commercial, or documentation purposes.
Technical Considerations and Camera Settings
Achieving high-quality time lapse recordings hinges on meticulous attention to camera setup and technical parameters. Proper configuration begins with selecting the appropriate camera mode; manual settings are essential to maintain consistency throughout the shoot. Manual focus eliminates fluctuations that automatic focus can induce, ensuring each frame remains sharp and focused on the desired subject or scene.
Exterior lighting conditions can vary significantly during prolonged shoots, making manual exposure settings crucial. Locking in ISO, aperture, and shutter speed prevents unwanted fluctuations in brightness or contrast, which can distract viewers or degrade the cohesiveness of the sequence. For scenes with changing light, such as sunrise or sunset, bracketing multiple exposures for later blending in post-production can be advantageous.
Interval selection directly impacts the smoothness of the final footage. For slow-moving subjects like flowering plants or cloud movement, longer intervals—between 5 to 30 seconds—capture gradual changes without producing choppy motion. Conversely, rapid processes such as traffic flow or construction require shorter intervals of 1 to 3 seconds to maintain fluidity.
Shutter speed plays a vital role in controlling motion blur and overall image sharpness. A common rule is to set the shutter speed approximately double the frame rate (e.g., 1/50 seconds for 24 fps). Adjustments may be necessary based on lighting conditions and subject motion to balance exposure and motion clarity.
Other critical elements include white balance, which should be set to a fixed value or custom to prevent color shifts. Additionally, using a sturdy tripod provides stability, preventing any camera movement that could compromise the sequence's visual coherence. Employing cable releases or intervalometers advances the camera's ability to shoot unattended, particularly for extended sessions.
Battery life management and data storage are often overlooked but are crucial for uninterrupted recording. High-capacity batteries or external power sources, such as portable power banks or AC adapters, ensure continuous operation. Ample storage capacity on memory cards prevents data loss and ensures every captured frame is preserved for editing.
Pre-configuring these camera settings before the start of the shoot minimizes the need for adjustments during recording, ensures consistency, and reduces post-production work. When technical details are diligently managed, the resulting footage reflects the intended visual narrative with precision and clarity, serving diverse purposes ranging from artistic projects to scientific documentation.
Legal and Ethical Considerations
When undertaking time lapse recording projects in Miami, understanding the parameters around privacy, property rights, and consent is essential to ensure responsible production practices. While capturing footage for various purposes, it is important to respect individuals' privacy and not intrude upon private spaces without appropriate permissions. This involves obtaining necessary authorizations when filming on private property or over sensitive areas, especially in residential zones or facilities with restricted access.
In public spaces, such as city streets and parks, recording is generally permissible, but attention should be paid to avoiding capturing individuals in compromising situations or infringing upon their personal privacy, particularly in contexts where subjects are identifiable and the footage is intended for public dissemination. Ensuring that recordings do not violate local ordinances or regulations related to surveillance helps maintain a lawful approach to time lapse projects.
Moreover, transparency about recording intentions can foster community trust and cooperation. When producing content for commercial or public distribution, informing relevant stakeholders and obtaining written consents when necessary can contribute to a smooth production process. This practice not only minimizes potential disputes but also upholds ethical standards within the industry.
It is equally important to respect copyright and intellectual property laws, particularly when incorporating third-party visuals, branding, or properties into the footage. Clear understanding and adherence to these legal frameworks safeguard against potential copyright infringements and promote legitimacy in the final product.
Finally, working with professionals well-versed in the legal landscape of Miami’s media and production environment ensures that your time lapse projects align with all pertinent regulations and ethical standards. This proactive approach helps maintain credibility, protects the interests of all parties involved, and contributes to the long-term success of your production endeavors.
Technical Considerations and Camera Settings
Optimizing camera settings is crucial to capturing high-quality time lapse footage in Miami’s diverse environments. First, selecting the appropriate interval between shots is essential; this depends on the speed of the subject or scene being recorded. For slow-moving scenes like cityscapes or cloud movements, intervals of 1 to 5 seconds often suffice. Conversely, for rapid changes or events, shorter intervals might be necessary to ensure smoothness.
Careful attention to camera resolution and frame rate settings impacts the final output's clarity and fluidity. Shooting in the highest possible resolution enables detailed shots that can be scaled or cropped during editing without loss of quality. Typically, recording at 24, 30, or 60 frames per second provides different viewing experiences, with 30 fps being the standard for most cinematic projects.
Stability is key for consistent results. Employing sturdy tripods, gimbals, or motorized sliders helps keep the camera steady, preventing jitter or unintentional shifts between images. Furthermore, choosing a camera with excellent manual controls allows precise adjustments to exposure, focus, and shutter speed.
Managing exposure settings is particularly important in Miami’s varying lighting conditions, from bright daylight to vibrant city lights at night. Utilizing manual exposure mode prevents fluctuations caused by automatic adjustments, which can result in flickering. Applying ND filters can help control light entry during daytime shooting, allowing for longer shutter times essential for achieving cinematic motion blur.
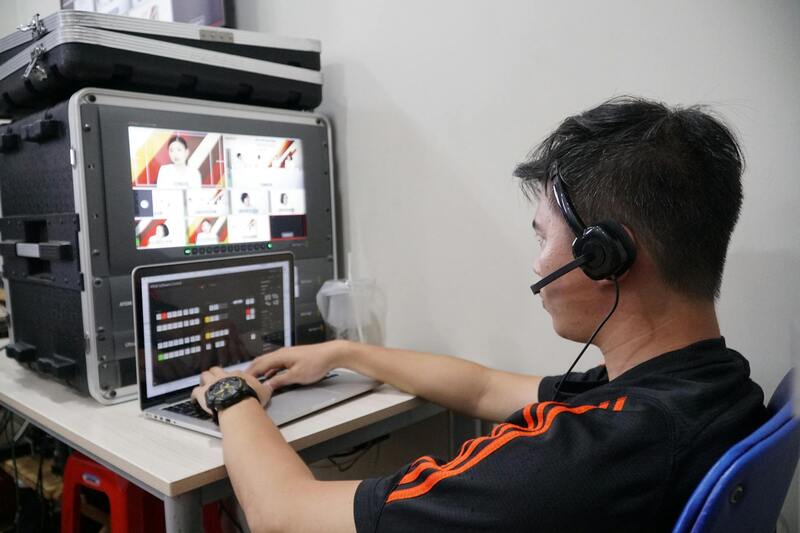
Editing and Post-Processing of Time Lapse Footage
Post-processing enhances the visual appeal and narrative clarity of time lapse videos. The first step involves importing the captured sequences into professional editing software, where images or clips are organized sequentially.
Frame stabilization tools can correct any minor jitters resulting from camera movement. Adjusting color grading and contrast helps to highlight specific features, such as the vibrant nightlife or the dynamic urban jungle of Miami. Additionally, the application of noise reduction techniques ensures clarity, especially in low-light scenes.
Speed adjustments and transitions further refine the flow of the sequence. For example, slowing down or speeding up segments can emphasize particular moments or create dramatic effects. Incorporating sound design—background music or ambient city sounds—can also add depth and immersion.
Ensuring compatibility with various playback formats and resolutions guarantees that the final product maintains its quality across different platforms, whether for online distribution, television, or film screenings. Mastering these techniques empowers creators to produce compelling time lapse narratives that accurately reflect the vibrancy and energy of Miami.
Technical Aspects of Time Lapse Recording in Miami
Achieving high-quality time lapse footage requires a solid understanding of technical parameters and camera settings. Critical factors include choosing the right interval between shots, managing exposure settings, and ensuring consistent focus throughout the shooting process.
Optimal Interval Selection
The interval between each shot directly influences the overall duration and speed of the final footage. Shorter intervals are suitable for capturing fast-moving scenes such as bustling Miami traffic or dynamic street performances, while longer intervals work best for gradual changes like sunset transitions or construction projects. It’s essential to balance the interval duration to prevent flickering and motion inconsistency.
Exposure and Aperture Control
Maintaining proper exposure is vital, especially in Miami’s vibrant daylight and nightlife settings. Manual exposure adjustments allow for better control over highlights and shadows, avoiding overexposure during daytime shoots and ensuring clarity during night scenes. Aperture settings should be chosen to maximize depth of field, ensuring that foreground and background elements remain sharp and in focus. For scenes with varying lighting conditions, bracketing exposures and blending them in post-production can produce balanced results.
Focus Precision
Automated focus modes often cause unintended shifts during long recording sessions. To avoid this, set the camera to manual focus before starting the shoot, locking it in place to maintain sharpness throughout. Use focus peaking features if available, to verify focus accuracy periodically. Precise focus ensures consistency, especially when capturing detailed cityscapes or intricate architectural features of Miami landmarks.
Lighting Considerations
Lighting dynamics significantly influence the appearance of time lapse footage. During daylight shoots, shooting during the golden hour—shortly after sunrise or before sunset—can add warmth and depth. At night, utilizing the city's ambient lighting enhances the vibrancy of Miami’s nightlife scenes. Employing additional lighting equipment, such as portable LED panels, can be beneficial for scenes requiring controlled illumination, especially indoors or in poorly lit areas.
Data Management and Storage
Since time lapse recordings involve capturing numerous high-resolution images or lengthy video segments, proper data management is crucial. Use high-capacity, high-speed SD cards or external drives to handle large files efficiently. Organize your media systematically, labeling sequences by date, location, and scene to facilitate smooth editing workflows. Regularly backing up data prevents loss due to technical issues, ensuring the integrity of the project from capture to post-production.
Post-Processing Techniques
Refining raw time lapse footage often involves stitching images into seamless sequences, stabilizing shaky shots, and color grading to enhance visual appeal. Advanced editing plugins can help eliminate flickering caused by exposure variance. For Miami-specific scenes, color grading can accentuate the city’s lively hues, from neon signs to sunset reflections on Biscayne Bay, creating an immersive viewing experience.